Difference between revisions of "Goblin Dungeon"
m |
(Updated Harvestable information.) |
||
| Line 6: | Line 6: | ||
| pmapdesc= Map by BetaNotus (5/19) | | pmapdesc= Map by BetaNotus (5/19) | ||
}} | }} | ||
| + | [[Goblin Dungeon]] is a regional name for the disastrous construction project underneath [[Eltibule Keep]]. This ill-fated maze of storehouses was overrun by Goblins, and the promised cleanup team sent from [[Statehelm]] never arrived. The residents of the Keep have boarded up the entrance enough to prevent Goblins and its other denizens from escaping to the surface, however prepared adventurers can find their way in. | ||
| − | + | Travelers throughout the region profess the wonderful loot found within the dungeon. Hunters of [[Goblin]]s will find Calling Cards to be plentiful, allowing for rapid mastery of [[Goblinese]]. Adventurers seeking potions, armor, and weapons will find it on Goblins, while their trained animals can provide a source for meat and skins. | |
| − | |||
| − | |||
Also of note, it contains a quest to defeat the [[Algapa|goblin boss]] and rescue the fairy [[Sarina]], which leads to learning [[Art History]]. There are also many spawns for various art objects within the dungeon to help you train after you learn the skill. | Also of note, it contains a quest to defeat the [[Algapa|goblin boss]] and rescue the fairy [[Sarina]], which leads to learning [[Art History]]. There are also many spawns for various art objects within the dungeon to help you train after you learn the skill. | ||
This dungeon can be very dangerous for those unprepared, as some of the creatures use powerful rage attacks and pull in groups. | This dungeon can be very dangerous for those unprepared, as some of the creatures use powerful rage attacks and pull in groups. | ||
| − | |||
| − | |||
== Points of Interest == | == Points of Interest == | ||
| + | ====Storerooms==== | ||
| + | There are many storerooms throughout the dungeon, however some will be lined with shelves. These shelves are stocked with spawns of scrolls, goblets, bread, and miscellaneous junk. The first one usually found is left of the entrance, while another deeper in the dungeon is populated with Mantis. | ||
| + | ====Art Galleries ==== | ||
| + | The first hallway leading right from the main hallway of the dungeon will lead to a series of storage rooms for art. There are also two chests in this gallery area. | ||
| − | + | Pulling should be performed carefully in these rooms, as there are usually two or three creatures in each split room that can aggro through the thin walls, potentially mobbing the unsuspecting art aficionado. On the other hand, solo explorers may find it much safer to stay in these rooms than in the main hallways, as there are less spawns in the side rooms, and the [[Brain Bug]]s are relatively harmless. | |
| − | |||
| − | |||
| − | |||
| − | |||
| − | + | ====Grand Room==== | |
| − | |||
| − | |||
| − | |||
| − | ====Grand Room | ||
A large room containing many paintings and treasures. Cheese wheels can spawn in the back (Mogyar Cheese). | A large room containing many paintings and treasures. Cheese wheels can spawn in the back (Mogyar Cheese). | ||
| Line 40: | Line 33: | ||
Once you are inside a good strategy if you are alone is to stay on the perimeter of the room. Pull ranged goblins by aggroing them and then hiding behind a pillar. This causes them to come closer so you can stun them and finish them without aggroing the center of the room. You will otherwise likely be overwhelmed as the goblins respawn rather quickly even if you take care not to bury the corpses. | Once you are inside a good strategy if you are alone is to stay on the perimeter of the room. Pull ranged goblins by aggroing them and then hiding behind a pillar. This causes them to come closer so you can stun them and finish them without aggroing the center of the room. You will otherwise likely be overwhelmed as the goblins respawn rather quickly even if you take care not to bury the corpses. | ||
| − | ====Mantis Gallery | + | ====Mantis Gallery==== |
An Art Gallery in the Northern section of the dungeon that is notable for a different layout than the rest of the Art Galleries, and being the only spawn point in the dungeon for a few [[Psychic Mantis]] and [[Simple Mantis]]. | An Art Gallery in the Northern section of the dungeon that is notable for a different layout than the rest of the Art Galleries, and being the only spawn point in the dungeon for a few [[Psychic Mantis]] and [[Simple Mantis]]. | ||
| − | ====Graz and Gruzark | + | ====Graz and Gruzark==== |
At the back of the room amidst a large number of small beds are ''Goblin Storage Chests''. These can be looted for random common equipment, and the odd (rare?) piece of Sulfur and Saltpeter. Looting these chests is rather cumbersome as they fill your inventory with 3 items at a time. | At the back of the room amidst a large number of small beds are ''Goblin Storage Chests''. These can be looted for random common equipment, and the odd (rare?) piece of Sulfur and Saltpeter. Looting these chests is rather cumbersome as they fill your inventory with 3 items at a time. | ||
| − | ====Kitchen | + | ====Kitchen==== |
At the far end of the left most corridor. '''Fruit Case'''s and '''Grain Sack'''s can be looted for Guava, Grapes, Red Apples, etc. Pigs (food likely). '''Goblin Stew''' {{Hint|Has Meat.}} can be drank from the cauldron, which is a ''drink'' that will stack with any foods you already have consumed (+12 health every few seconds when out of combat). | At the far end of the left most corridor. '''Fruit Case'''s and '''Grain Sack'''s can be looted for Guava, Grapes, Red Apples, etc. Pigs (food likely). '''Goblin Stew''' {{Hint|Has Meat.}} can be drank from the cauldron, which is a ''drink'' that will stack with any foods you already have consumed (+12 health every few seconds when out of combat). | ||
| − | ====Back Entrance | + | ====Back Entrance==== |
If you search the outside walls of Eltibule Keep you will find a hatch that connects to the northern area of the dungeon. The hatch drops into a hallway, the end of which is an one-way invisible wall that you can not cross back. Once you cross the invisible wall you are in the main hallway of the dungeon. | If you search the outside walls of Eltibule Keep you will find a hatch that connects to the northern area of the dungeon. The hatch drops into a hallway, the end of which is an one-way invisible wall that you can not cross back. Once you cross the invisible wall you are in the main hallway of the dungeon. | ||
| − | ====Goblin Annex | + | ====Goblin Annex==== |
If you just keep going straight for a long time, past all the corridors, you’ll meet a new guardian. Beyond that guardian, the tunnels get VERY difficult! Be warned. You’ll want a LARGE group — it sounds like seven to nine people would be safest if you’re all in the low 30s with your combat skills. A smaller group may work if you’re higher level. | If you just keep going straight for a long time, past all the corridors, you’ll meet a new guardian. Beyond that guardian, the tunnels get VERY difficult! Be warned. You’ll want a LARGE group — it sounds like seven to nine people would be safest if you’re all in the low 30s with your combat skills. A smaller group may work if you’re higher level. | ||
| − | A few tips from Auriel | + | A few tips from Auriel. |
* You have to destroy the crystals in a certain time period | * You have to destroy the crystals in a certain time period | ||
| Line 84: | Line 77: | ||
}} | }} | ||
| − | ==Inhabitants== | + | == {{msg:BASEPAGENAME}} Inhabitants == |
====Friends==== | ====Friends==== | ||
| − | + | <dpl> | |
| − | + | category = Goblin Dungeon NPCs | |
| + | mode = unordered | ||
| + | columns = 3 | ||
| + | </dpl> | ||
====Foes==== | ====Foes==== | ||
<dpl> | <dpl> | ||
| Line 102: | Line 98: | ||
columns = 3 | columns = 3 | ||
</dpl> | </dpl> | ||
| − | == | + | === Harvestables === |
| − | + | <!-- List of harvestable items. Sort by type (Fish, Fruit, Plants, Wood, Mushrooms, Minerals & Metal, Miscellaneous. Miscellaneous includes graves, eggs, and other stuff. --> | |
| − | + | ==== Food ==== | |
| + | {| | ||
| + | {{Item|Snacking Bread}} | ||
| + | |} | ||
| + | ==== Wood ==== | ||
| + | {| | ||
| + | |{{Item|Shoddy Storage Crate}} | ||
| + | |{{Item|Crude Storage Crate}} | ||
| + | |{{Item|Oak Wood Chips}} (Broken Barrels or crates) | ||
| + | |{{Item|Oak Wood}} | ||
| + | |{{Item|Filigreed Jewelry Box}} | ||
| + | |} | ||
| + | ==== Miscellaneous ==== | ||
| + | {| | ||
| + | | {{Item|Empty Bottle}} | ||
| + | | {{Item|Basic Ink}} | ||
| + | | {{Item|Grass}} (hay) | ||
| + | | {{Item|Spoon}} | ||
| + | |- | ||
| + | | {{Item|Fire Resistance Potion}} | ||
| + | | {{Item|Cold Resistance Potion}} | ||
| + | | {{Item|Dirt Shield Potion}} | ||
| + | | {{Item|Bottle of Sugar Water}} | ||
| + | |- | ||
| + | | {{Item|Bottle of Whey}} | ||
| + | | {{Item|Bottle of Milk}} | ||
| + | | {{Item|Ancient Bronze Coin}} | ||
| + | | {{Item|Unidentified Painting}} | ||
| + | |} | ||
==Gallery== | ==Gallery== | ||
<gallery widths="200px" heights="150px"> | <gallery widths="200px" heights="150px"> | ||
| Line 112: | Line 136: | ||
</gallery> | </gallery> | ||
| − | == | + | ==Soundtrack== |
| − | + | [https://soundcloud.com/conorbracemusic/project-gorgon-dungeon-crawling Dungeon Crawling] (SoundCloud) by Conor Brace | |
| + | == Trivia == | ||
| + | * Early in development, the [[Goblin Dungeon]] was considered end-game content. Players frequently ended up leveling their combat skills from 20 to 50 here. | ||
| + | * The [[Goblin Dungeon]] was the first dungeon revised during development to receive an expansion, rather than a complete replacement. | ||
[[Category:Dungeons]][[Category:Eltibule Dungeons]] | [[Category:Dungeons]][[Category:Eltibule Dungeons]] | ||
Revision as of 14:22, 23 April 2020
Goblin Dungeon
| |
|---|---|
| File:Goblin Dungeon (map).png Map of Goblin Dungeon (click for larger size)
| |
| Connects to | |
| Area Level | 20 - 40
|
| File:Goblin DungeonPlayerMap.png Map by BetaNotus (5/19)
| |
Goblin Dungeon is a regional name for the disastrous construction project underneath Eltibule Keep. This ill-fated maze of storehouses was overrun by Goblins, and the promised cleanup team sent from Statehelm never arrived. The residents of the Keep have boarded up the entrance enough to prevent Goblins and its other denizens from escaping to the surface, however prepared adventurers can find their way in.
Travelers throughout the region profess the wonderful loot found within the dungeon. Hunters of Goblins will find Calling Cards to be plentiful, allowing for rapid mastery of Goblinese. Adventurers seeking potions, armor, and weapons will find it on Goblins, while their trained animals can provide a source for meat and skins.
Also of note, it contains a quest to defeat the goblin boss and rescue the fairy Sarina, which leads to learning Art History. There are also many spawns for various art objects within the dungeon to help you train after you learn the skill.
This dungeon can be very dangerous for those unprepared, as some of the creatures use powerful rage attacks and pull in groups.
Points of Interest
Storerooms
There are many storerooms throughout the dungeon, however some will be lined with shelves. These shelves are stocked with spawns of scrolls, goblets, bread, and miscellaneous junk. The first one usually found is left of the entrance, while another deeper in the dungeon is populated with Mantis.
Art Galleries
The first hallway leading right from the main hallway of the dungeon will lead to a series of storage rooms for art. There are also two chests in this gallery area.
Pulling should be performed carefully in these rooms, as there are usually two or three creatures in each split room that can aggro through the thin walls, potentially mobbing the unsuspecting art aficionado. On the other hand, solo explorers may find it much safer to stay in these rooms than in the main hallways, as there are less spawns in the side rooms, and the Brain Bugs are relatively harmless.
Grand Room
A large room containing many paintings and treasures. Cheese wheels can spawn in the back (Mogyar Cheese).
Sarina the fairy is imprisoned here, guarded by the mini boss Algapa along with many other goblins and bears.
This room can be very deadly, as especially around the doorway it's easy for a player to get mobbed by monsters hidden off to the left and right. The Goblin Boss himself can hit very hard and often comes with a large group of other Goblins, so visitors should use caution not to get too close unless they are well prepared.
It is possible to peel off many of the Goblins in the room, and at least 5 of the 6 painting spawns can usually be reached without aggroing the boss.
Once you are inside a good strategy if you are alone is to stay on the perimeter of the room. Pull ranged goblins by aggroing them and then hiding behind a pillar. This causes them to come closer so you can stun them and finish them without aggroing the center of the room. You will otherwise likely be overwhelmed as the goblins respawn rather quickly even if you take care not to bury the corpses.
Mantis Gallery
An Art Gallery in the Northern section of the dungeon that is notable for a different layout than the rest of the Art Galleries, and being the only spawn point in the dungeon for a few Psychic Mantis and Simple Mantis.
Graz and Gruzark
At the back of the room amidst a large number of small beds are Goblin Storage Chests. These can be looted for random common equipment, and the odd (rare?) piece of Sulfur and Saltpeter. Looting these chests is rather cumbersome as they fill your inventory with 3 items at a time.
Kitchen
At the far end of the left most corridor. Fruit Cases and Grain Sacks can be looted for Guava, Grapes, Red Apples, etc. Pigs (food likely). Goblin Stew Hint can be drank from the cauldron, which is a drink that will stack with any foods you already have consumed (+12 health every few seconds when out of combat).
Back Entrance
If you search the outside walls of Eltibule Keep you will find a hatch that connects to the northern area of the dungeon. The hatch drops into a hallway, the end of which is an one-way invisible wall that you can not cross back. Once you cross the invisible wall you are in the main hallway of the dungeon.
Goblin Annex
If you just keep going straight for a long time, past all the corridors, you’ll meet a new guardian. Beyond that guardian, the tunnels get VERY difficult! Be warned. You’ll want a LARGE group — it sounds like seven to nine people would be safest if you’re all in the low 30s with your combat skills. A smaller group may work if you’re higher level.
A few tips from Auriel.
- You have to destroy the crystals in a certain time period
- If you miss one or they respawn, the chest in the boss room will tell you how many you are missing
- The chest also does not open. Your loot will appear in your pack. Everyone gets their own loot.
- You can only get loot from a chest once per hour.
- You might want to walk instead of run
- Even if you have a dedicated healer, DO bring your own heals. There really aren't enough "heal other" spells, unless you are only healing one person. What seemed to work best for me is having a Battle Chemistry Golem spam heals. Always and using Mentalism buffs, either armor or health depending on gear.
- Have a clear leader and stay together
- If you decide to split up, put a healer in both groups
- Remember, heals do not go through walls
- If you are lost, click your leader on your group panel and cast a spell. It will path you to your leader.
- Use your group chat tab, and watch chat as best you can
- While using your group tab, realize you will not receive PMs there
Error: Item not foundUlaur ordered me to write this note. He thinks Lady Eltibule will send a rescue party. I think we're going to die down here. But I hope I am wrong. If you're the rescue party, here's what we've learned:
If you destroy a crystal, you have only fifteen minutes before it reappears.
We believe that if you can knock out all the same-colored crystals at once, you can unlock the treasure vaults.
According to Ulfak's old plans, there should be three red crystals and seven green ones, each with a separate vault.
We are struggling to get past the second crystal on the red side. If we still live, that's where we'll be.
-Ulalmax
—
Old Note
Goblin Dungeon Inhabitants
Friends
|
|
Foes
Bosses
Harvestables
Food
Wood
| (Broken Barrels or crates) |
Miscellaneous
| (hay) | |||
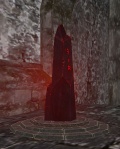
Gallery

One of many paintings found on the walls

A Goblin Spear Scout
An Ancient Beacon
.jpg)

.png)
Soundtrack
Dungeon Crawling (SoundCloud) by Conor Brace
Trivia
- Early in development, the Goblin Dungeon was considered end-game content. Players frequently ended up leveling their combat skills from 20 to 50 here.
- The Goblin Dungeon was the first dungeon revised during development to receive an expansion, rather than a complete replacement.